
These are:
Access to your web server (via shell or FTP)
| # | PROCESSOR | RAM | HDD | TRAFFIC |
|---|---|---|---|---|
| 1 | Intel Core i5-2500 3.30GHz | 8GB | 2 x 1000GB | 10TB (a month) |
Download and unzip the GRASP package from http://grasp.org/download/, or From the files you recived from the GRASP Team.
If you determine that you'll need to create one manually, follow the instructions for accessing phpMyAdmin on various servers, or follow the instructions for Using Plesk, Using cPanel or Using phpMyAdmin below.
If you are installing GRASP on your own web server, follow the Using phpMyAdmin or Using the MySQL Client instructions below to create your GRASP username and database.
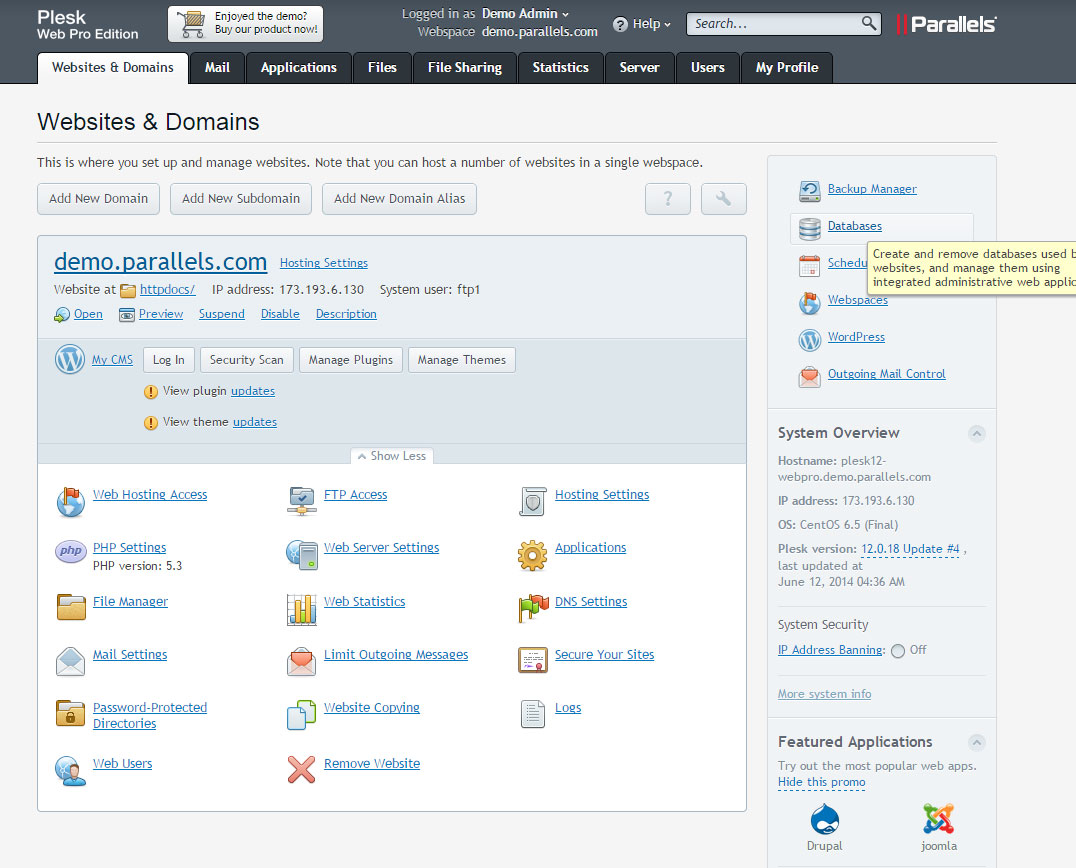
If your hosting provider supplies the Plesk hosting control panel and you want to install GRASP package, follow the instructions below to create a database:
- Log in to Plesk.
- Click Databases in the Custom Website area of your website on the Websites & Domains page:
- Click Add New Database, change database name if you want, create database user by providing credentials and click OK. You're done!
If your hosting provider supplies thecPanel hosting control panel, you may follow these simple instructions to create your GRASP username and database. A more complete set of instructions for using cPanel to create the database and user can be found in Using cPanel.
- Log in to your cPanel.
- Click MySQL Database Wizard icon under the Databases section.
- In Step 1. Create a Database enter the database name grasp and click Next Step.
- In Step 2. Create Database Users enter the database user name and the password. Make sure to use a strong password. Click Create User.
- In Step 3. Add User to Database click the All Privileges checkbox and click Next Step.
- In Step 4. Complete the task note the database name and user. Write down the values of†hostname,-†username -†databasename, and the password you chose. (Note that†hostname†will usually be†localhost.)
Lunarpages has developed their own version of cPanel.
- Log in to your account.
- Go to Control Panel.
- Click on the button on the left panel labeled 'Go to LPCP'.
- Go to MySQL Manager.
- Add the user name and database name but leave the host name as the default IP number.
- Note the IP address of the database on the right which is different from the default IP number of the host indicated in the above step.
- When modifying the database.php file, use the DB IP number, not 'LOCALHOST'.
- When modifying the database.php file, be sure to use the full name of the database and user name, typically 'accountname_nameyoucreated'.
- Refer to√ā¬†http://wiki.lunarpages.com/Create_and_Delete_MySQL_Users_in_LPCP√ā¬†for more info.
Note: These instructions are written for phpMyAdmin 3.5; the phpMyAdmin user interface can vary slightly between versions.
- If a database relating to GRASP does not already exist in the Database dropdown on the left, create one:
- Choose a name for your GRASP database: 'grasp' or 'mygrasp' are good, but most hosting services (specially shared hosting) will require a name beginning with your username there and an underscore, so, even if you work on your own computer, we advise you to check now your hosting service requirements so that you conform with them on your own server and would be able to transfer your database without modification when it will be ready.
Enter the chosen database name in the Create database field and choose the best collation for your language and encoding. In most cases it's better to choose in the "utf8_" series and, if you don't find your language, to choose "utf8_unicode_ci" (Reference:  StackOverFlow.com).After naming the database (here " grasp ") and choosing the collation (here "utf8_general_ci"), click on theCreate button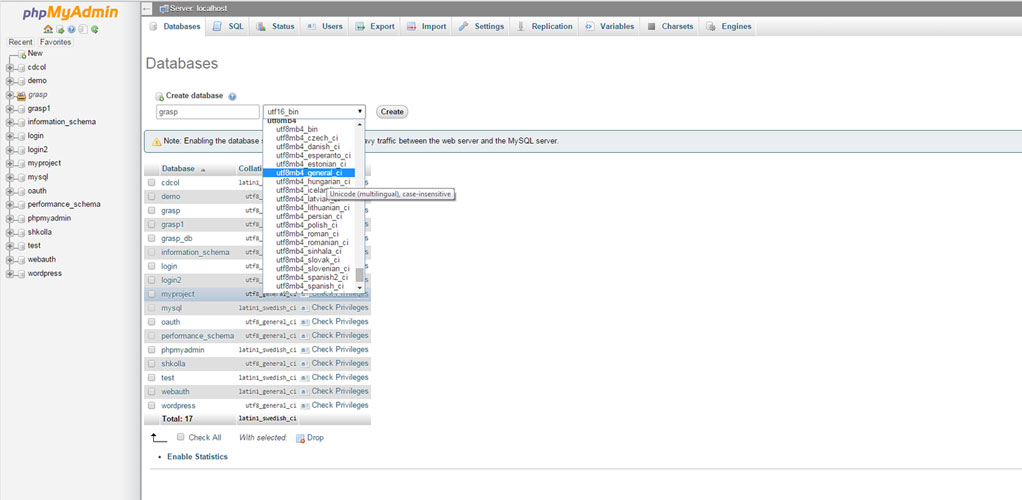
- Choose a name for your GRASP database: 'grasp' or 'mygrasp' are good, but most hosting services (specially shared hosting) will require a name beginning with your username there and an underscore, so, even if you work on your own computer, we advise you to check now your hosting service requirements so that you conform with them on your own server and would be able to transfer your database without modification when it will be ready.
- Click the phpMyAdmin icon in the upper left to return to the main page, then click the Users tab. If a user relating to GRASP does not already exist in the list of users, create one:
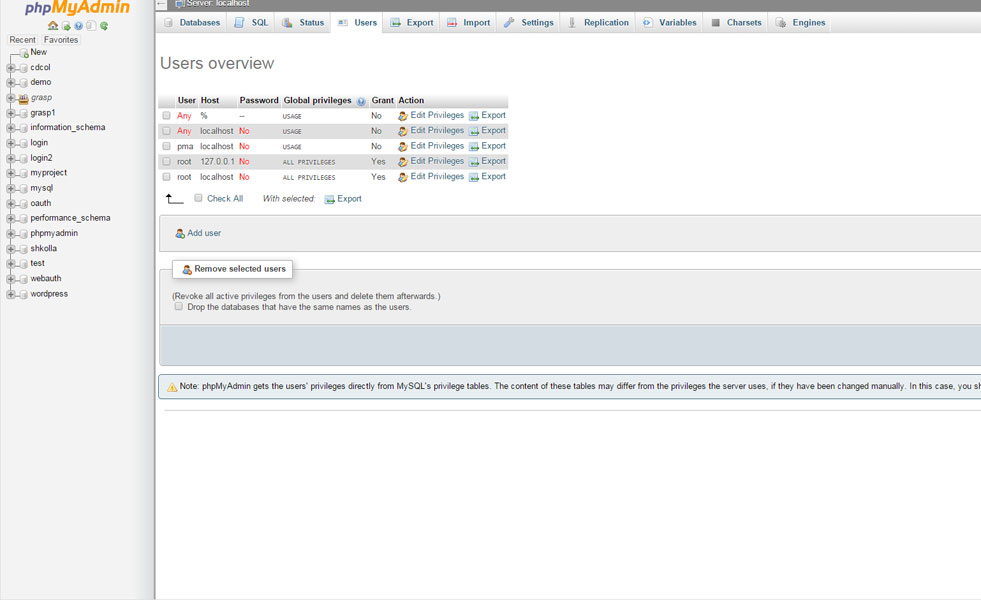
- Click Add user.
- Choose a username for GRASP ('my username' is good) and enter it in the User name field. (Be sure Use text field: is selected from the dropdown.)
- Choose a difficult-to-guess password (ideally containing a combination of upper- and lower-case letters, numbers, and symbols), and enter it in the Password field. (Be sure Use text field: is selected from the dropdown.) Re-enter the password in the Re-type field.
- Write down the username and password you chose.
- Leave all options under Global privileges at their defaults.
- Click Go.
- Return to the Users screen and click the Edit privileges icon on the user you've just created for GRASP. In the Database-specific privileges section, select the database you've just created for GRASP under the Add privileges to the following database dropdown. The page will refresh with privileges for that database. Click Check All to select all privileges, and click Go.
- On the resulting page, make note of the host name listed after Server: at the top of the page. (This will usually be localhost.)
You can create MySQL users and databases quickly and easily by running mysql from the shell. The syntax is shown below and the dollar sign is the command prompt:
$ mysql -u adminusername -p
Enter password:
Welcome to the MySQL monitor.  Commands end with ; or \g.
Your MySQL connection id is 5340 to server version: 3.23.54

Type 'help;' or '\h' for help. Type '\c' to clear the buffer.

mysql> CREATE DATABASE databasename;
Query OK, 1 row affected (0.00 sec)

mysql> GRANT ALL PRIVILEGES ON databasename.* TO "graspusername"@"hostname"
    -> IDENTIFIED BY "password";
Query OK, 0 rows affected (0.00 sec)

mysql> FLUSH PRIVILEGES;
Query OK, 0 rows affected (0.01 sec)

mysql> EXIT
Bye
$
The example shows:
- that root is also the adminusername. It is a safer practice to choose a so-called "mortal" account as your mysql admin, so that you are not entering the command "mysql" as the root user on your system. (Any time you can avoid doing work as root you decrease your chance of being exploited). The name you use depends on the name you assigned as the database administrator using mysqladmin.
- grasp or mygrasp are good values for databasename.
- grasp is a good value for graspusername but you should realize that, since it is used here, the entire world will know it too.
- hostname will usually be localhost. If you don't know what this value should be, check with your system administrator if you are not the admin for your GRASP host. If you are the system admin, consider using a non-root account to administer your database.
- password should be a difficult-to-guess password, ideally containing a combination of upper- and lower-case letters, numbers, and symbols. One good way of avoiding the use of a word found in a dictionary is to use the first letter of each word in a phrase that you find easy to remember.
If you need to write these values somewhere, avoid writing them in the system that contains the things protected by them. You need to remember the value used for databasename, graspusername, hostname, and password. Of course, since they are already in (or will be shortly) your database.php file, there is no need to put them somewhere else, too.
Return to where you extracted the GRASP package in Step 1, find the file database.php and open it in a text editor. This file is located grasp\admin\conn\database.php
 // ** MySQL settings - You can get this info from your web host ** //
define ("DB_HOST", "localhost"); // set database host
define ("DB_USER", "root"); // set database user
define ("DB_PASS","your password"); // set database password
define ("DB_NAME","grasp"); // set database name
The hostname you determined in Step 2 (usually localhost, but not always; If a port, socket, or pipe is necessary, append a colon (:) and then the relevant information to the hostname.
Save the database.php file.
Now you will need to decide where on your domain you'd like your GRASP-powered web aplication to appear:
- In the root directory of your website. (For example, http://example.com/)
- In a subdirectory of your website. (For example, http://example.com/grasp/)
Note: The location of your root web directory in the filesystem on your web server will vary across hosting providers and operating systems. Check with your hosting provider or system administrator if you do not know where this is.
In the Root Directory
- If you need to upload your files to your web server, use an FTP client to upload all the contents of the grasp directory (but not the directory itself) into the root directory of your website.
- If your files are already on your web server, and you are using shell access to install GRASP, move all of the contents of the grasp directory (but not the directory itself) into the root directory of your website.
In a Subdirectory
- If you need to upload your files to your web server, rename the grasp directory to your desired name, then use an FTP client to upload the directory to your desired location within the root directory of your website.
- If your files are already on your web server, and you are using shell access to install GRASP, move the grasp directory to your desired location within the root directory of your website, and rename the directory to your desired name.
Note: If your FTP client has an option to convert file names to lower case, make sure it's disabled.
Point a web browser to start the installation script.
- If you placed the GRASP files in the root directory, you should visit: http://example.com/admin/install/
- If you placed the GRASP files in a subdirectory called mygrasp, for example, you should visit: http://example.com/mygrasp/admin/install/
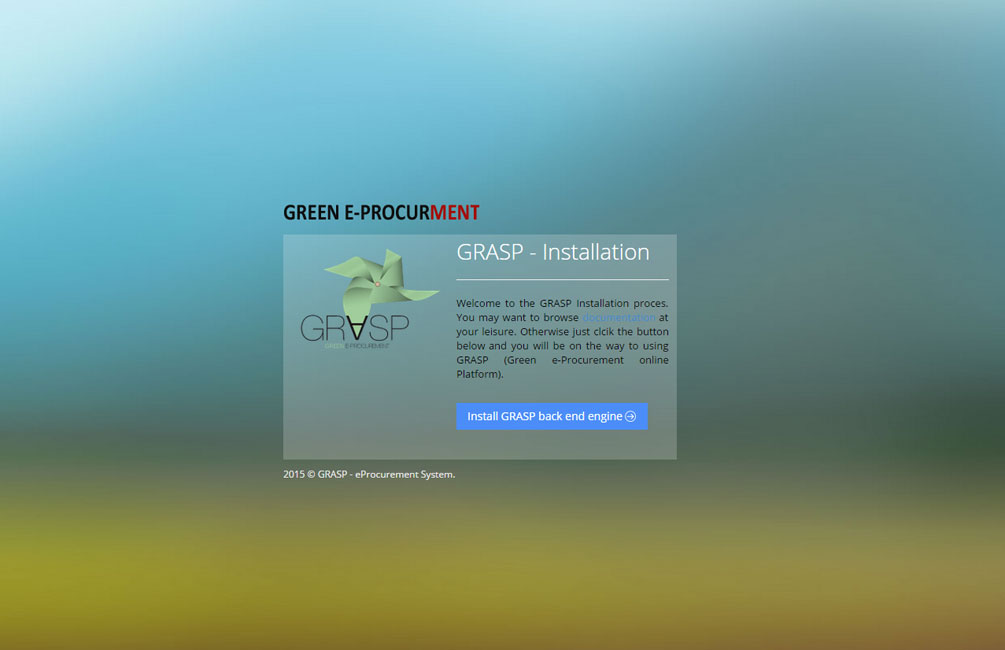
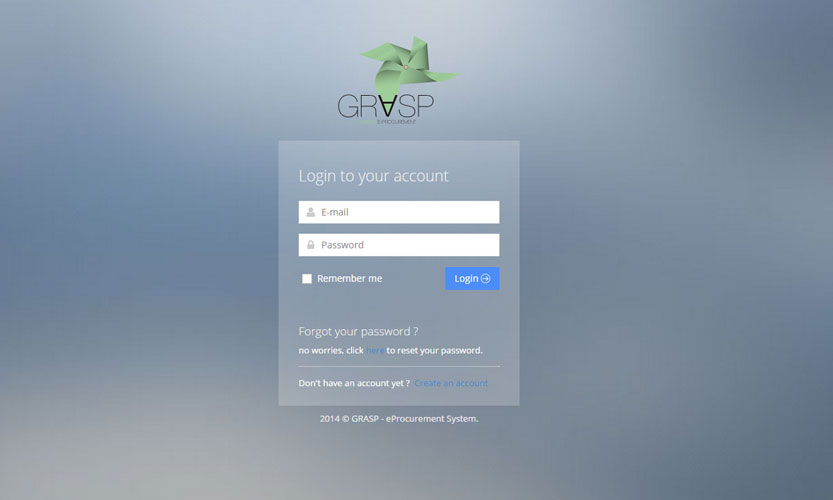
The following screenshots show how the system should look after correct install. http://example.com/

The following screenshots show how the system admin should look after correct install. http://example.com/admin/
You should now be able to login with username= graspadmin@grasp.com and password = 123456789. After logon you will be able to change them.
- If you get an error about the database when you run the grasp project:
I see a directory listing rather than a web page.
The web server needs to be told to view index.php by default. In Apache, use the DirectoryIndex index.php directive. The simplest option is to create a file named .htaccess in the installed directory and place the directive there. Another option is to add the directive to the web server's configuration files.
I see lots of Headers already sent errors. How do I fix this?
You probably introduced a syntax error in editing database.php.
- Download database.php (if you don't have shell access).
- Open it in a text editor.
- Check that the first line contains nothing but <?php, and that there is no text before it (not even whitespace).
- Check that the last line contains nothing but ?>, and that there is no text after it (not even whitespace).
- If your text editor saves as Unicode, make sure it adds no byte order mark (BOM). Most Unicode-enabled text editors do not inform the user whether it adds a BOM to files; if so, try using a different text editor.
- Save the file, upload it again if necessary, and reload the page in your browser.
My page comes out gibberish. When I look at the source I see a lot of "<?php ?>" tags.
If the <?php ?> tags are being sent to the browser, it means your PHP is not working properly. All PHP code is supposed to be executed before the server sends the resulting HTML to your web browser. (That's why it's called a preprocessor.) Make sure your web server meets the requirements to run GRASP, that PHP is installed and configured properly, or contact your hosting provider or system administrator for assistance.
I keep getting an Error connecting to database message but I'm sure my configuration is correct.
Try resetting your MySQL password manually. If you have access to MySQL via shell, try issuing:
SET PASSWORD FOR 'graspusername'@'hostname' = OLD_PASSWORD('password');
If you are using a version of MySQL prior to 4.1, use PASSWORD instead of OLD_PASSWORD. If you do not have shell access, you should be able to simply enter the above into an SQL query in phpMyAdmin. Failing that, you may need to use your host's control panel to reset the password for your database user.
Here's the quick version of the instructions for those who are already comfortable with performing such installations.
- Download and unzip the GRASP package if you haven't already.
- Create a database for GRASP on your web server, as well as a MySQL user who has all privileges for accessing and modifying it.
- Find database.php, then edit the file (see Editing database.php) and add your database information.
- Upload the GRASP files to the desired location on your web server:
- If you want to integrate GRASP into the root of your domain (e.g. http://example.com/), move or upload all contents of the unzipped GRASP directory (excluding the GRASP directory itself) into the root directory of your web server.
- If you want to have your GRASP installation in its own subdirectory on your website (e.g. http://example.com/grasp/), create the blog directory on your server and upload the contents of the unzipped GRASP package to the directory via FTP.
- Note: If your FTP client has an option to convert file names to lower case, make sure it's disabled.
- Run the GRASP platform by accessing the URL in a web browser. This should be the URL where you uploaded the GRASP files.
- If you installed GRASP in the root directory, you should visit: http://example.com/
- If you installed GRASP in its own subdirectory called grasp, for example, you should visit: http://example.com/grasp/
That's it! GRASP should now be installed.